Types of Window Damage from Improper Cleaning
Scratched Glass
How Scratches Occur:
Abrasive Particle Drag:
- Construction dust contains hard particles (silica, metal filings)
- Dry wiping drags these particles across glass surface
- Creates micro-scratches that show in sunlight
- Paper towels especially abrasive on dusty glass
- Even single wipe can create permanent damage
Severity Levels:
- Minor scratching: Visible only in direct sunlight, difficult to feel
- Moderate scratching: Visible from multiple angles, can feel with fingernail
- Severe scratching: Obvious from any angle, catches fingernail, may affect view
- Deep scoring: Permanent damage requiring glass replacement
Prevention:
- NEVER dry wipe dusty new windows
- Always remove loose dust first with water or vacuum
- Use only microfiber cloths (never paper towels on new windows)
- Proper technique prevents scratching entirely
Damaged Low-E Coatings
Understanding Low-E Windows:
What Low-E Coating Is:
- Microscopic metallic coating on glass surface
- Reflects infrared light (keeps heat in or out)
- Critical for energy efficiency
- Invisible when properly maintained
- Essential in Phoenix climate (reflects summer heat)
How Coatings Get Damaged:
- Abrasive cleaners: Scrubbing powders literally scratch coating off
- Wrong chemicals: Ammonia-based cleaners can deteriorate coating
- Hard objects: Scrapers, razor blades remove coating permanently
- Harsh wiping: Aggressive dry wiping can wear coating
- Incorrect products: Some "glass cleaners" contain coating-damaging ingredients
Signs of Coating Damage:
- Hazy or cloudy appearance
- Rainbow effect in sunlight
- Inconsistent reflectivity
- Reduced energy efficiency
- May void warranty (coating damage often not covered)
Protection:
- Use only Low-E safe cleaning products
- Verify which side has coating (usually interior on double-pane)
- Never use ammonia-based cleaners
- Never use abrasive pads or scrapers
- Follow manufacturer cleaning recommendations
Frame Damage
Vinyl Frame Issues:
Common Damage:
- Scratching from abrasive cleaning: Permanent marks on vinyl
- Discoloration from wrong products: Some cleaners yellow vinyl
- Warping from heat: Hot water or steam cleaning can warp frames
- Seal damage: Harsh chemicals can compromise weatherstripping
Prevention:
- Use pH-neutral cleaners on vinyl
- Room temperature or cool water only
- Soft microfiber only (no abrasive pads)
- Avoid petroleum-based products
Aluminum Frame Issues:
Potential Damage:
- Corrosion from harsh chemicals: Acids and alkalines damage finish
- Scratching from abrasives: Visible on anodized finishes
- Paint damage: Paint can be removed by harsh cleaners or scraping
Protection:
- Use aluminum-safe cleaners
- Test products in inconspicuous area first
- Never use steel wool or abrasive pads
- Dry thoroughly to prevent water spots (especially in Phoenix hard water)
Wood Frame Concerns:
Damage Risks:
- Water damage: Excessive moisture can warp or stain wood
- Finish damage: Wrong products can strip or dull finishes
- Swelling: Standing water can cause wood to swell
Protection:
- Minimal water use
- Immediate drying
- Wood-safe cleaning products only
- Follow manufacturer recommendations
Window Seal and Weatherstripping Damage
Critical Importance:
What Seals Do:
- Prevent air and water infiltration
- Maintain insulated glass unit (IGU) integrity
- Critical for energy efficiency
- Expensive to repair if damaged
How Cleaning Can Damage Seals:
- Harsh chemicals: Degrade rubber and silicone seals
- Excessive force: Scrubbing near seals can break them
- Sharp tools: Scrapers can cut weatherstripping
- Heat: Hot water or steam can damage adhesives
Signs of Seal Damage:
- Condensation between panes
- Air leaks
- Loose weatherstripping
- Visible gaps or separation
What's On New Windows After Construction
Construction Stickers and Labels
Types of Labels:
Manufacturer Labels:
- Energy ratings (required by law, usually on glass)
- Brand identification stickers
- Installation instructions
- Safety certifications
- Bar codes and model numbers
Placement:
- Usually on glass corners
- Sometimes on frames
- May be on interior or exterior
- Adhesive varies by manufacturer
Installer Protection:
- Temporary protective film
- Tape for spacing during installation
- Construction protection labels
Paint Overspray and Splatters
Common Sources:
How Paint Gets on Windows:
- Exterior painting (overspray from sprayers)
- Interior painting (roller splatter)
- Trim painting (brush contact)
- Texture spraying (airborne particles)
Types of Paint on Windows:
- Latex/water-based: Easier to remove when fresh
- Oil-based: More difficult, requires careful removal
- Spray paint: Fine mist that bonds to glass
- Texture spray: Can bond to glass surface
Time Factor:
- Fresh paint (hours old): Easiest removal
- Dried paint (days old): More difficult
- Cured paint (weeks old): Most challenging
- Aged paint (months old): May require professional removal
Drywall Compound and Dust
Drywall Contamination:
How It Gets on Windows:
- Airborne dust during sanding
- Splatter during application
- Drips from ceiling work
- Texture spray
Why It's Problematic:
- Bonds to glass when wet
- Very fine particles scratch when dry wiped
- Contains gypsum (mildly alkaline)
- Creates hazy film when dried
Removal Challenges:
- Must be softened before removal
- Can't be dry wiped without scratching
- Requires specific technique
- Often missed in corners and edges
Silicone and Caulk Residue
Sealant Contamination:
Sources:
- Installation sealant application
- Exterior caulking
- Waterproofing applications
- Touch-up caulking
Issues:
- Silicone is permanent if not removed immediately
- Smears across glass during application
- Difficult to remove once cured
- Wrong solvents can damage window components
Concrete and Grout Splatter
Masonry Contamination:
How It Occurs:
- Stucco application (very common in Phoenix)
- Concrete pouring or grinding
- Mortar from brickwork
- Tile grout near windows
Removal Challenges:
- Hardens like cement
- Requires acid-based removers (carefully)
- Can permanently etch glass if left too long
- Difficult to remove without damaging glass
Phoenix-Specific: Hard Water Staining
Mineral Deposits:
How They Form:
- Construction water splashes on windows
- Irrigation overspray
- Window cleaning with hard water
- Rain combined with dust
Phoenix Hard Water Issues:
- Extremely high mineral content (300-400 PPM typical)
- White calcium/magnesium deposits
- Bonds to glass quickly
- Difficult to remove once set
- Can permanently etch glass if left long-term
Professional Window Cleaning Tools and Materials
Essential Equipment
Proper Tools:
✓ Vacuum with Soft Brush Attachment:
- For initial dust removal
- HEPA filtration preferred
- Soft bristles won't scratch
- Reaches window tracks
✓ Microfiber Cloths (Multiple):
- At least 6-8 dedicated to windows
- Different colors for different tasks
- Wash before first use
- Replace when worn
✓ Squeegee (Professional Quality):
- Rubber blade, not plastic
- Multiple sizes (6", 10", 14")
- Clean blade before each pass
- Replace blade seasonally
✓ Bucket and Cleaning Solution:
- Two-bucket method (clean water, rinse water)
- Large enough for squeegee
- pH-neutral solution
✓ Extension Pole:
- For high windows
- Fits squeegee and brushes
- Telescoping for different heights
✓ Spray Bottles:
- For cleaning solution
- For water rinse
- Adjustable spray pattern
Safe Cleaning Solutions
What TO Use:
For General Cleaning:
- Distilled or filtered water (eliminates hard water issues)
- pH-neutral dish soap (Dawn, 1-2 drops per gallon)
- Commercial Low-E safe window cleaner
- Vinegar solution (1 cup white vinegar per gallon water) - only if no Low-E coating
For Sticker Removal:
- Warm water soak (first attempt)
- Goo Gone (test first, avoid seals)
- Mineral spirits (exterior only, test first)
- Commercial adhesive remover (Low-E safe)
For Paint Removal:
- Plastic razor blade (safer than metal)
- Paint softener (Low-E safe formula)
- Denatured alcohol (spot treatment only)
For Hard Water Stains:
- CLR (Calcium Lime Rust) - diluted and tested first
- White vinegar (if no Low-E coating)
- Commercial hard water removers (Low-E safe)
- Lemon juice and water solution
Phoenix-Specific:
- ALWAYS use filtered or distilled water for final rinse
- Hard water will leave spots on clean windows
- Consider whole-house water softener for long-term
What NOT to Use
Avoid These Products/Tools:
❌ Ammonia-Based Cleaners:
- Windex and similar products
- Can damage Low-E coatings
- Can harm window tint
- Can deteriorate seals over time
❌ Abrasive Cleaners:
- Powdered cleansers (Comet, Ajax)
- Scrubbing pads (Scotch-Brite)
- Magic Erasers (act like fine sandpaper)
- Steel wool
❌ Harsh Chemicals:
- Bleach
- Strong acids or alkalines
- Petroleum-based solvents (near seals/frames)
- Acetone or MEK
❌ Wrong Tools:
- Paper towels (too abrasive for dusty windows)
- Newspaper (ink can stain frames)
- Old rags (may contain debris)
- Metal razor blades (scratch glass easily)
- Pressure washers on windows (can break seals)
Step-by-Step Professional Window Cleaning Process
Step 1: Initial Inspection and Preparation
Before You Begin:
Inspect Windows:
- Check for existing damage or defects
- Photograph any issues found
- Identify coating location (interior or exterior)
- Note areas with heavy contamination
- Verify manufacturer warranty requirements
Gather Materials:
- All tools within reach
- Cleaning solution prepared
- Drop cloths in place
- Ladder positioned safely (if needed)
- Good lighting for inspection
Weather Considerations:
- Don't clean in direct sunlight (solutions dry too fast)
- Avoid windy days (dust contamination)
- Ideal: overcast or early morning/late evening
- Temperature: 50-85°F ideal
Step 2: Remove Stickers and Labels
Proper Sticker Removal:
Method 1: Warm Water Soak (Try First):
- Spray sticker liberally with warm water
- Let soak 5-10 minutes
- Gently peel from corner
- Re-wet and repeat if needed
- Remove residue with soapy water
Method 2: Heat Method (Stubborn Stickers):
- Use hair dryer on low heat
- Heat sticker for 30-60 seconds
- Peel while warm
- Clean residue with appropriate solvent
- Wash area with soap and water
Method 3: Adhesive Remover (Last Resort):
- Test product on corner first
- Apply per manufacturer instructions
- Let dwell recommended time
- Wipe away with microfiber
- Wash thoroughly with soap and water
- Avoid contact with seals and frames
Critical Tips:
- NEVER use metal scraper
- Plastic razor blade okay for glass only (not Low-E)
- Work slowly and patiently
- Remove all adhesive residue before regular cleaning
- Don't let solvents sit on frames or seals
Step 3: Initial Dust Removal
Critical First Step:
Vacuum Method (Preferred):
- Use soft brush attachment
- Vacuum glass surface gently
- Vacuum frames and sills
- Vacuum window tracks thoroughly
- Remove loose particles completely
Alternative: Water Rinse:
- Spray window liberally with plain water
- Let water capture and carry dust
- Wipe with wet microfiber (fresh water)
- Change water frequently
- Never let dust dry on window
Why This Matters:
- Prevents scratching in subsequent steps
- Removes abrasive particles
- Makes remaining cleaning easier
- Essential for new window protection
Step 4: Address Paint and Heavy Contamination
Paint Removal Technique:
For Latex Paint:
- Soak painted area with warm soapy water
- Let soak 5-10 minutes
- Use plastic razor blade at 45-degree angle
- Keep glass wet during scraping
- Wipe residue with microfiber
- Repeat if needed
For Oil-Based Paint:
- Apply paint softener per product instructions
- Let dwell recommended time
- Carefully scrape with plastic blade
- Clean with appropriate solvent
- Wash thoroughly with soap and water
For Texture Spray:
- Soak with warm water
- Use soft brush to loosen
- Wipe with microfiber
- May require multiple passes
- Don't scrape unless necessary
Drywall Compound Removal:
- Soak with warm water 10-15 minutes
- Use soft sponge to loosen
- Wipe with microfiber
- Repeat soaking as needed
- Final wash with clean water
Step 5: Main Window Cleaning
Professional Squeegee Technique:
Prepare Solution:
- 1-2 drops dish soap per gallon water
- Use filtered or distilled water (Phoenix!)
- Water should be room temperature
- Mix gently (no excessive bubbles)
Application:
- Wet window completely with solution
- Use microfiber or sponge applicator
- Cover entire surface
- Don't let solution dry on glass
Squeegee Method:
- Start at top corner
- Pull squeegee across in smooth motion
- Overlap slightly with each pass
- Wipe blade clean after each pass
- Work top to bottom
- Final pass straight down each side
Detail Work:
- Use clean microfiber for edges
- Dry window sills immediately
- Wipe frames dry
- Clean any drips on glass
Alternative Microfiber Method:
- Wet entire window with solution
- Wipe with clean wet microfiber
- Follow immediately with dry microfiber
- Buff to streak-free finish
- Change cloths frequently
Step 6: Frame and Track Cleaning
Frame Detailing:
Vinyl Frames:
- Wipe with damp microfiber
- Use soft brush for textured areas
- Dry thoroughly
- Avoid standing water in frame channels
Aluminum Frames:
- Wipe with appropriate cleaner
- Dry immediately (Phoenix hard water!)
- Buff to shine if desired
- Check weep holes clear
Wood Frames:
- Barely damp cloth only
- Follow wood grain
- Dry immediately
- Inspect finish for damage
Track Cleaning:
- Vacuum thoroughly first
- Wipe with damp cloth
- Use soft brush for corners
- Dry completely
- Ensure drainage holes clear
Step 7: Final Inspection and Touch-Up
Quality Check:
Inspect From Multiple Angles:
- Look from inside and outside
- Check in direct and indirect light
- Look for streaks, spots, or residue
- Verify frames are clean and dry
Common Issues:
- Streaks: Usually from dirty squeegee or cloth
- Spots: Often hard water deposits
- Haze: Cleaning solution residue
- Smears: Inadequate rinsing
Touch-Up:
- Address any spots or streaks immediately
- Use clean water and fresh cloth
- Dry thoroughly
- Buff to perfect clarity
Phoenix Hard Water Challenges and Solutions
Understanding Phoenix Water Quality
Local Water Characteristics:
Extreme Hardness:
- 300-400 PPM total dissolved solids (very hard)
- High calcium and magnesium content
- Minerals bond quickly to glass
- Create white, crusty deposits
- Can permanently etch glass over time
Impact on Window Cleaning:
- Can't use tap water for cleaning (will leave spots)
- Existing hard water stains may be present
- Regular cleaning more difficult
- Prevention essential
Hard Water Stain Removal
For Fresh Deposits:
Method 1: Vinegar Solution (No Low-E):
- Mix 50/50 white vinegar and water
- Spray on affected areas
- Let sit 5-10 minutes
- Wipe with microfiber
- Rinse with distilled water
- Dry thoroughly
Method 2: CLR (Test First):
- Dilute CLR per directions (usually 1:1 with water)
- Test on small corner
- Apply to stains only
- Let sit 1-2 minutes maximum
- Rinse very thoroughly with distilled water
- Dry completely
For Set-In Stains:
- May require professional treatment
- Consider commercial hard water stain removers (Low-E safe)
- Very fine polishing compound (professional use only)
- Severe cases may be permanent etching
Prevention Strategies
Ongoing Protection:
Always Use Filtered Water:
- Final rinse with distilled water
- Consider whole-house water softener
- Portable DI (deionized) water filter for cleaning
Quick Response:
- Dry any water on windows immediately
- Address irrigation overspray quickly
- Clean windows before monsoon season
- Regular maintenance prevents buildup
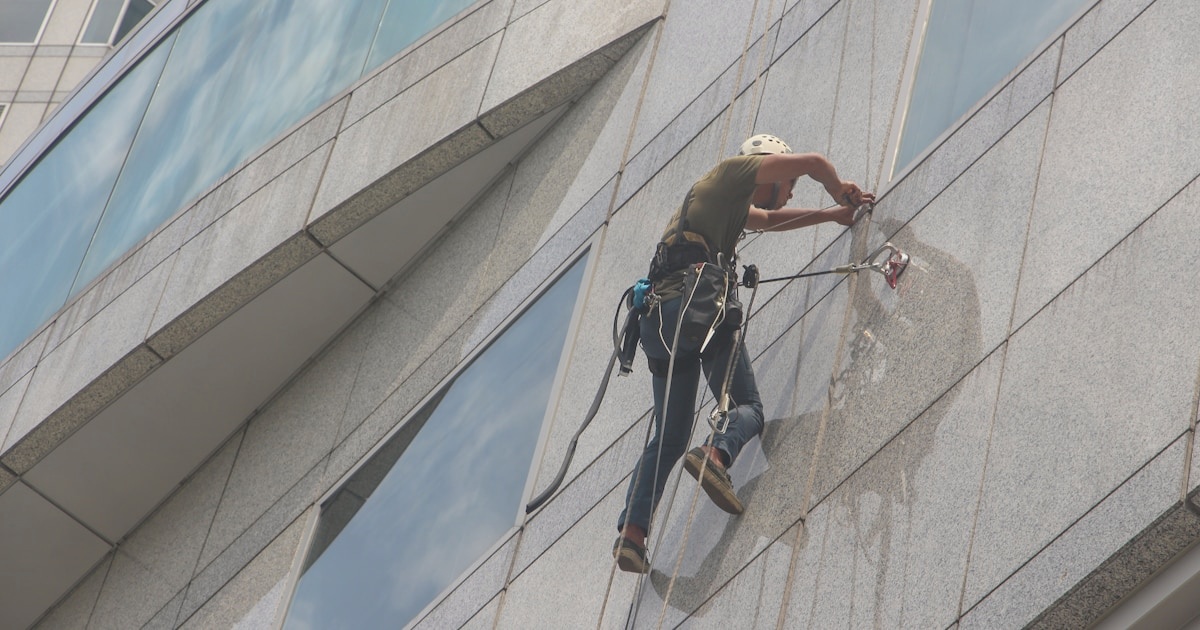
When to Call Professional Window Cleaners
Situations Requiring Professional Help
Hire Professionals When:
Large or Complex Projects:
- Homes over 2,500 sq ft
- Multi-story windows
- Hard-to-reach windows
- Many windows need cleaning
Specialized Issues:
- Severe hard water staining
- Multiple coatings (Low-E, tint, etc.)
- Paint contamination on many windows
- Construction damage needs assessment
Time and Safety:
- High windows requiring ladders/lifts
- Limited time available
- Safety concerns
- Want warranty protection
Commercial Properties:
- Multiple floors
- Specialized glass types
- Regular maintenance needs
- Liability considerations
Professional Service Advantages
What Professionals Provide:
Specialized Equipment:
- Pure water systems (eliminates hard water issues)
- Professional-grade squeegees and tools
- High-reach equipment (water-fed poles)
- Commercial cleaning solutions
Expertise:
- Identify glass and coating types
- Know which products are safe
- Experience with all contamination types
- Efficient technique (hours vs. days for DIY)
Insurance and Warranty:
- Liability coverage if damage occurs
- Warranty protection maintained
- Professional results guaranteed
- Documentation if needed
Cost-Benefit:
- Phoenix average: $150-300 for full home exterior windows
- Interior add: $100-200
- Saves 8-20 hours of your time
- Professional results vs. DIY trial and error
- Prevents damage from improper technique
Warranty Considerations
What Voids Window Warranties
Common Warranty Exclusions:
Improper Cleaning:
- Using abrasive cleaners or tools
- Harsh chemicals on Low-E coatings
- Pressure washers
- Metal scrapers on glass
- Damage from cleaning attempts
Documentation:
- Keep all warranty paperwork
- Follow manufacturer cleaning guidelines
- Save professional cleaning receipts
- Document any pre-existing issues
Manufacturer-Specific Requirements
Check Your Warranty For:
- Specific approved cleaning products
- Required cleaning frequency
- Prohibited products and methods
- Professional cleaning requirements
- Reporting procedures for issues
Major Brands:
- Each has specific care instructions
- Usually available on website
- Often included with window installation
- Worth reviewing before cleaning
Long-Term Window Maintenance
Cleaning Frequency
Recommended Schedule:
Exterior Windows:
- Phoenix: Every 2-3 months minimum (desert dust)
- After dust storms
- After monsoon season
- Before hosting events
Interior Windows:
- Every 3-6 months
- As needed for fingerprints/smudges
- After construction or major cleaning projects
Tracks and Frames:
- Clean with windows
- Check drainage holes seasonally
- Vacuum tracks monthly
Ongoing Protection
Preventive Measures:
Screen Maintenance:
- Clean screens regularly
- Reduces dust transfer to glass
- Vacuum before removing for cleaning
Landscaping Considerations:
- Avoid sprinklers hitting windows
- Trim plants away from windows
- Reduces hard water and debris issues
Quick Response:
- Address water spots immediately
- Clean bird droppings promptly
- Remove tape/stickers ASAP
- Don't let contamination set
Complete New Window Cleaning Checklist
✓ Preparation:
- Inspect windows for existing damage
- Photograph any issues
- Gather all proper tools and materials
- Prepare cleaning solution (filtered water!)
- Protect floors with drop cloths
✓ Initial Cleaning:
- Remove all stickers and labels
- Vacuum or wet-rinse dust away
- Address paint and heavy contamination
- Allow proper dwell time for solutions
✓ Main Cleaning:
- Wash glass with proper solution
- Squeegee or wipe clean
- Clean frames appropriate to material
- Detail window tracks
- Clean sills and surrounding areas
✓ Final Steps:
- Final rinse with distilled water
- Dry all surfaces thoroughly
- Inspect from multiple angles
- Touch up any missed spots
- Clean up work area
✓ Documentation:
- Photograph clean windows
- Save warranty information
- Keep cleaning product records
- Note any issues discovered
Conclusion
Cleaning newly installed windows requires a methodical approach that prioritizes protection over speed, understands the differences between construction cleanup and regular maintenance, and recognizes that new windows are more vulnerable to damage than established ones. The key principles – never dry wipe dusty windows, always identify and protect Low-E coatings, use only appropriate cleaning products and tools, address Phoenix hard water challenges with filtered water, and remove stickers and paint with patience rather than force – will protect your window investment and maintain warranty coverage. Whether you invested $5,000 or $50,000 in new windows, proper initial cleaning sets the stage for decades of clarity and performance, while improper technique can cause permanent damage within hours. For most homeowners, especially in Phoenix where hard water and desert dust create unique challenges, hiring professional window cleaners for that critical first post-installation cleaning ($150-300 for average home) is money well spent, providing peace of mind that your new windows are properly cared for from day one, warranties remain intact, and you can enjoy the view without worrying about whether you accidentally scratched your new investment.